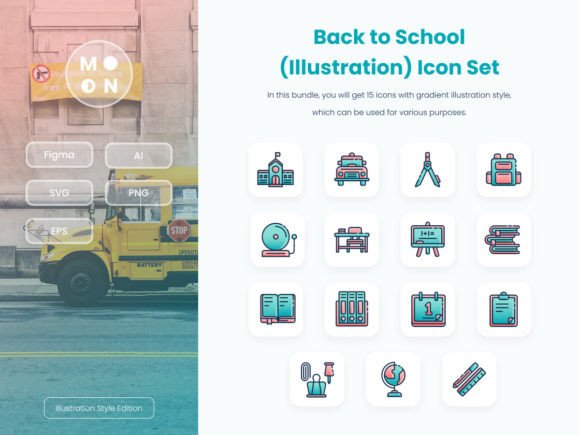
Back to School Icon Pack
A Designer’s First Look: Friendly, Clean, and Ready for Real Stitches
When I opened the Back to School Icon Pack, my first thought wasn’t “cute” or “trendy”—it was “this will stitch cleanly.” That matters. As someone who’s stitched hundreds of custom items—from baby onesies for boutique clients to embroidered aprons for school cafeterias—I know illustration-style icons can easily fall apart under thread. These 15 education-themed icons land in that sweet spot: confident line work, intentional negative space, and a gentle hand-drawn charm without overcomplicating edges. They feel like illustrations made *for* translation—not just for screen viewing. The mood is warm and inclusive, not childish or corporate. Think kindergarten teacher’s tote bag, not textbook cover.
How It Actually Performs on Fabric (Not Just in Preview)
Last week, I prepped a small-batch run of cotton canvas tote bags for a local after-school program—custom embroidered with one icon per bag: an open book, a pencil, a backpack, a chalkboard. I used the Back to School Icon Pack as the core design asset. Here’s what stood out in real-world use:
- Stitch clarity held up beautifully on medium-weight canvas—even at 2.5" width. No fuzzy corners or collapsed satin stitches. The outlines were crisp, and fill areas stayed breathable thanks to balanced stitch density.
- It scaled well down to 1.75" for baby onesie embroidery (a tiny apple icon on a 3-month size). No detail vanished, and running stitch accents—like the subtle lines on the pencil eraser—still read clearly.
- On dark fabric, I paired it with bright ecru thread instead of white. The contrast popped without glare, and the clean silhouette meant no halo effect around edges—a common issue with overly dense fill-stitch icons.
- For patches, I chose two icons (a graduation cap and a notebook) and ran them as standalone embroidered patches on twill. With light tear-away stabilizer and a standard hoop size, they came off the machine flat and crisp—no puckering, no distortion.
Where It Shines—and Where You’ll Want to Pause
This isn’t a one-size-fits-all embroidery file. Its strength lies in thoughtful application—not blanket use. It works exceptionally well for:
- Custom apparel: Sweatshirt embroidery (especially left-chest placement), lightweight crewnecks, and structured caps where clean shapes read from a distance.
- Personalized gifts: Embroidered tea towels for teachers, pillow covers for nursery decor, or mini quilt blocks for back-to-school care packages.
- Craft business assets: Digital embroidery files sold alongside physical kits, printable mockups for Etsy listings, or branded merchandise for small educational studios.
But tread carefully with:
- Ultra-thin or stretchy fabrics (like jersey or lightweight rayon)—the icons rely on stable shape definition, so extra cutaway stabilizer and reduced stitch speed help.
- Curved surfaces like baseball caps: test the smallest icon first. Some details—like fine crosshatching on a chalkboard icon—can compress or blur if hooped too tightly.
- Dense layering: Don’t stack multiple icons tightly together on one garment. Their illustrative style needs breathing room—or the visual rhythm gets lost.
- Frequent-wash items (think toddler bibs or daycare smocks): confirm thread colorfastness and reinforce any delicate running-stitch accents with a second pass if needed.
What It Adds to Your Finished Product—Beyond the Stitch
Using the Back to School Icon Pack doesn’t just add decoration—it adds intention. Customers notice when an embroidered pencil isn’t just a shape, but feels *handmade* and considered. That translates directly to perceived value. A client ordering personalized sweatshirts for her tutoring business told me, “Parents said it looked ‘thoughtful,’ not ‘mass-produced.’” That’s the difference between a generic clipart vibe and a cohesive brand moment.
It also supports consistency across product lines: same icon on a patch, a tea towel, and a digital greeting card. That unity builds trust—especially for Etsy sellers and small shop owners curating seasonal collections. And because the icons avoid dated trends (no neon gradients or hyper-realistic shading), they age gracefully. You won’t cringe reviewing last year’s holiday gift batch.
Practical Notes Every Embroidery Designer Should Check
Before you load it into your machine or list it in your shop:
- Test on scrap fabric first—especially if using textured weaves or dark backgrounds. Watch how fine lines behave.
- Review stitch density. If your machine struggles with tight fills, simplify or adjust density in your software—but only if your license permits editing.
- Confirm hoop size compatibility. Some icons may need repositioning for smaller hoops; others scale better than they rotate.
- Inspect small details under magnification: are there tiny isolated stitches? Do letterforms (if any) hold legibility at 1.5"? (Note: this pack contains no text-based icons, which simplifies things.)
- Check licensing thoroughly before selling finished products or reselling digital files. Since it’s categorized as Illustrations and Graphics, verify commercial use rights for both physical and digital embroidery projects.
- Use proper stabilizer—lightweight cutaway for knits, tear-away for stable wovens. Skipping this step undermines even the best machine embroidery design.
- Compare light/dark fabric mockups. What reads softly on cream may vanish on navy—adjust thread choice accordingly.
Final Thought: A Quietly Reliable Workhorse
The Back to School Icon Pack won’t shout. It won’t go viral on Pinterest with flashy effects. But it delivers something rarer in embroidery design: quiet reliability. It stitches true, scales honestly, and carries warmth without cloying sentiment. Whether you’re embroidering a single personalized gift or building a full seasonal collection for your craft business, it’s the kind of digital embroidery file that earns repeat use—not because it’s flashy, but because it simply works. And in our world—where time, thread, and customer trust are all finite—that’s the highest compliment.